
目次
はじめに
Microsoftが提供する「Power Apps Code Apps」は、従来のローコード開発に加え、React, VueやTypeScriptなどのプロ開発の言語を活用できる新しい開発スタイルです。
GitHub Copilotとの連携により、AI支援による効率的なアプリ開発が可能となり、開発者の生産性を大幅に向上させます。
ついにCode appsが日本環境でも利用できるようになりました。
本記事では最初につまづきがちなプロ開発環境の整え方について実践的な手順を紹介します。
Code Apps は 2026年2月に一般提供しました。日本環境でも提供されています。
Quickstart: Create your first code app- Power Apps | Microsoft Learn
今後の業務アプリ開発において、Code Appsは重要な選択肢となるでしょう。まずは試してみることから始めてみてください。
前提条件
Power Apps Code Appsを利用するには、以下の環境が必要です。
- Visual Studio Code(Power Platform Tools 拡張機能をインストール済み)
- Node.js(LTS版)と npm
- GitHub アカウントと Git の設定
- Power Platform CLI(
pacコマンド)
手順概要
Power Platform 管理センター にて、機能を有効化します。
今回、私がサンプルのPowerShell スクリプトを作成しています。このブログから入手してください。
このスクリプトの効率的な実行のため、PowerShell のVSCode拡張機能のインストールを推奨します。
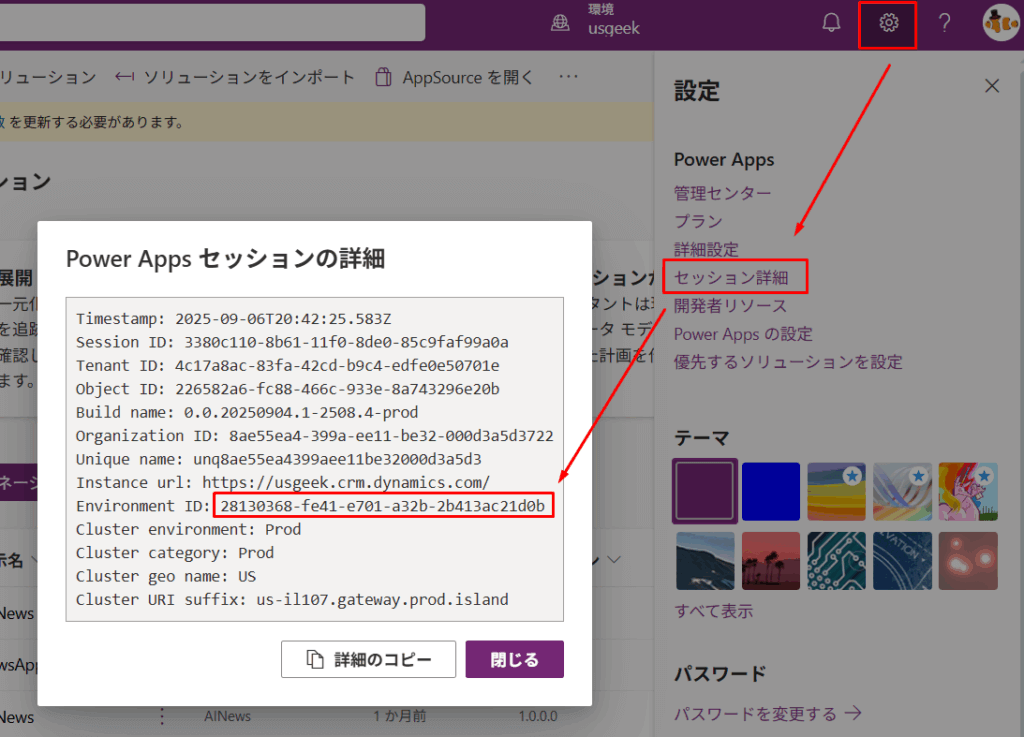
make.powerapps.com のURLにアクセスし、環境IDを取得します。
開発資産を保存するためのフォルダを作成します。
Step1で入手したスクリプトに環境IDとワークスペースのフォルダパスを指定し、スクリプトを実行します。
Power Apps にて、Code Apps を実行します。
手順詳細
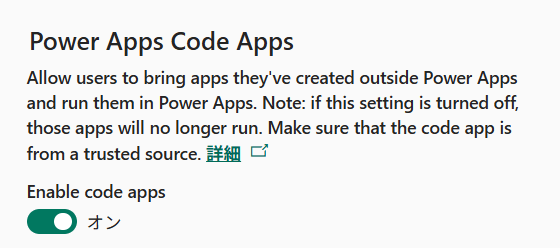
環境でCode Appsを有効にする
Power Platform 管理センター > 環境 > 機能 > 設定 に、以下のような設定項目が現れています。こちらを有効にします。
スクリプトの取得
Visual Studio Code をインストールし、以下のスクリプトを実行します。
こちらのスクリプトは、GitHubのコードを元にして様々なケースに対応できるように追加で開発を行ったものです。
元にしたコードはこちらです。
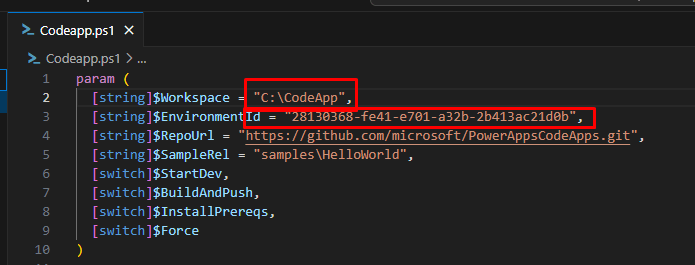
param (
  [string]$Workspace = "自分のワークスペースのパスを入れる。例: C:\CodeApp",
  [string]$EnvironmentId = "自分の環境IDをいれる。例: 28130368-fe41-e701-a32b-2b413ac21d0b",
  [string]$RepoUrl = "https://github.com/microsoft/PowerAppsCodeApps.git",
  [string]$SampleRel = "samples\HelloWorld",
  [switch]$StartDev,
  [switch]$BuildAndPush,
  [switch]$InstallPrereqs,
  [switch]$Force
)

Set-StrictMode -Version Latest
$ErrorActionPreference = 'Stop'

# Platform detection for older PowerShell versions
if (-not (Test-Path variable:\IsWindows)) {
  try {
    $IsWindows = [System.Runtime.InteropServices.RuntimeInformation]::IsOSPlatform([System.Runtime.InteropServices.OSPlatform]::Windows)
  } catch {
    # Fallback for Windows PowerShell where RuntimeInformation may not exist
    $IsWindows = $env:OS -and $env:OS -like '*Windows*'
  }
}

function Install-Prerequisites {
    param([switch]$Force)

    if (-not (Get-Command winget -ErrorAction SilentlyContinue)) {
        Write-Warning "winget not found. Please install winget manually or run with administrator privileges: https://learn.microsoft.com/windows/package-manager/"
        return
    }

    $packages = @(
        @{ id = 'Git.Git'; name = 'Git' },
        @{ id = 'OpenJS.NodeJS.LTS'; name = 'Node.js LTS' },
        @{ id = 'Microsoft.PowerApps.CLI'; name = 'Power Apps CLI' }
    )

    foreach ($p in $packages) {
        Write-Host "Installing $($p.name) via winget..."
        try {
            Start-Process -FilePath winget -ArgumentList 'install','--id',$p.id,'-e','--accept-package-agreements','--accept-source-agreements' -NoNewWindow -Wait -ErrorAction Stop
        } catch {
            Write-Warning "Failed to install $($p.name) via winget: $_"
        }
    }

    if (Get-Command code -ErrorAction SilentlyContinue) {
        Write-Host 'Installing Power Platform VS Code extension...'
        try {
            code --install-extension microsoft-IsvExpTools.powerplatform-vscode --force
        } catch {
            Write-Warning "Failed to install VS Code extension: $_"
        }
    } else {
        Write-Host 'VS Code command (code) not found. Please install VS Code and manually add the extension.'
    }

    Write-Host 'Prerequisite installation finished. Please restart the terminal if necessary.'
}

if ($InstallPrereqs) {
    Write-Host 'InstallPrereqs specified - installing required prerequisites...'
    Install-Prerequisites -Force:$Force
}

function Require-Command($name, $installUrl) {
  if (-not (Get-Command $name -ErrorAction SilentlyContinue)) {
    Write-Warning "$name not found. Suggested install: $installUrl"

    # Offer to install prerequisites using the existing Install-Prerequisites function
    $installChoice = Read-Host "Install prerequisites now using winget (may require admin)? (Y/N)"
    if ($installChoice -and $installChoice.ToLower() -eq 'y') {
      if (Get-Command Install-Prerequisites -ErrorAction SilentlyContinue) {
        try {
          Install-Prerequisites -Force
        } catch {
          Write-Warning "Automatic prerequisite installation failed: $_"
        }
      } else {
        Write-Warning "Install-Prerequisites helper not available. Please install $name from $installUrl."
      }
    } else {
      Write-Warning "$name is required but automatic install was skipped."
    }

    # Re-check after attempted install or skip
    if (-not (Get-Command $name -ErrorAction SilentlyContinue)) {
      # Try to locate the executable on disk (common install locations) and add to PATH for current session
      $exeName = if ($name -match 'node|npm') { "$name.exe" } else { "$name.exe" }
      $searchRoots = @()
      if ($env:ProgramFiles) { $searchRoots += $env:ProgramFiles }
  if (${env:ProgramFiles(x86)}) { $searchRoots += ${env:ProgramFiles(x86)} }
      if ($env:LOCALAPPDATA) { $searchRoots += $env:LOCALAPPDATA }
      if ($env:USERPROFILE) { $searchRoots += $env:USERPROFILE }
      $searchRoots += 'C:\Program Files','C:\Program Files (x86)'

      $found = $null
      foreach ($root in $searchRoots | Where-Object { Test-Path $_ }) {
        try {
          $candidate = Get-ChildItem -Path $root -Filter $exeName -Recurse -ErrorAction SilentlyContinue | Select-Object -First 1
          if ($candidate) { $found = $candidate; break }
        } catch {
          # ignore and continue
        }
      }

      if ($found) {
        $dir = $found.DirectoryName
        Write-Host "Found $($found.Name) at $dir. Adding to PATH for this session."
        if (-not ($env:Path -split ';' | Where-Object { $_ -ieq $dir })) {
          $env:Path = $env:Path + ';' + $dir
        }

        if (Get-Command $name -ErrorAction SilentlyContinue) {
          Write-Host "$name detected after updating PATH. Continuing..."
          return
        }
      }

      # Final failure - provide clearer diagnostics and actionable steps
      Write-Error "$name still not found after installation attempt and local search. Common fixes:
  - Restart this terminal session after installing Node/npm so PATH updates take effect.
  - Install Node.js for 'All Users' or add its install folder (e.g. C:\Program Files\nodejs) to your PATH.
  - Verify that the executable exists (node.exe / npm.cmd) and is reachable.
Please install manually from $installUrl, restart the terminal, and re-run this script."
      exit 1
    } else {
      Write-Host "$name detected. Continuing..."
    }
  }
}

Require-Command git 'https://git-scm.com/'
Require-Command node 'https://nodejs.org/'
Require-Command npm 'https://nodejs.org/'

if (-not (Get-Command pac -ErrorAction SilentlyContinue)) {
  Write-Warning "Power Apps CLI (pac) not found. Please install pac: https://learn.microsoft.com/power-platform/developer/cli/install"
  Read-Host -Prompt "Press Enter to continue (Cancel with Ctrl+C)"
}

if (-not (Test-Path $Workspace)) { New-Item -ItemType Directory -Path $Workspace -Force | Out-Null }
Set-Location $Workspace

$repoName = [System.IO.Path]::GetFileNameWithoutExtension($RepoUrl)
$repoDir = Join-Path $Workspace $repoName
if (-not (Test-Path $repoDir)) {
  Write-Host "Cloning $RepoUrl into $repoDir..."
  git clone $RepoUrl
} else {
  Write-Host "Repository already exists at $repoDir. Fetching latest..."
  Push-Location $repoDir
  git fetch --all
  git pull
  Pop-Location
}

$samplePath = Join-Path $repoDir $SampleRel
if (-not (Test-Path $samplePath)) { Write-Error "Sample path not found: $samplePath"; exit 1 }
Set-Location $samplePath
Write-Host "Working directory: $PWD"

Write-Host "Installing npm dependencies..."
if ($IsWindows) { & npm.cmd install } else { & npm install }

if (Get-Command pac -ErrorAction SilentlyContinue) {
  Write-Host "Power Apps CLI detected. Running pac auth create --environment $EnvironmentId"
  pac auth create --environment $EnvironmentId
} else {
  Write-Warning "pac not found. Please perform authentication and deployment manually."
}

if (-not (Test-Path .\power.config.json)) {
  if (Get-Command pac -ErrorAction SilentlyContinue) {
    Write-Host "Initializing code app (pac code init --displayName 'HelloWorld Sample')..."
    pac code init --displayName "HelloWorld Sample" | Out-Null
  } else {
    Write-Warning "power.config.json does not exist and pac is not available for automatic initialization."
  }
} else {
  Write-Host "power.config.json already exists."
}

if ($StartDev) {
  Write-Host "Starting local dev server (npm run dev). Exit with Ctrl+C."
  if ($IsWindows) { & npm.cmd run dev } else { & npm run dev }
  exit 0
}

if ($BuildAndPush) {
  if (-not $Force) {
  $ok = Read-Host "Build and push to environment ${EnvironmentId}? (y/N)"
    if ($ok.ToLower() -ne 'y') { Write-Host "Cancelled"; exit 0 }
  }
  Write-Host "Building..."
  if ($IsWindows) { & npm.cmd run build } else { & npm run build }
  if (Get-Command pac -ErrorAction SilentlyContinue) {
    Write-Host "Pushing to Power Apps..."
    pac code push --environment $EnvironmentId
    Write-Host "Push completed."
  } else {
    Write-Error "pac not found. Cannot execute push."
    exit 1
  }
}

Write-Host "Done. Use -StartDev or -BuildAndPush "環境IDの取得
環境IDの取得方法は色々ありますが、例えばこのようにPower Apps 作成者ポータルから取得することができます。
作業用のフォルダの作成
例えば、Cドライブの直下などにソリューション用のフォルダを作成してそのパスを覚えておきます。
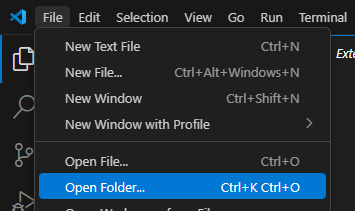
そのフォルダをVSCodeから開きます。このようにすることで作業用フォルダ(ワークスペース)とすることができます。
新しくファイルを作成して、PowerShellのコードをペーストします。
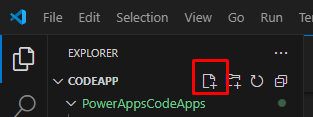
例えば、このようなファイル名にします。

ペーストした後、ワークスペースのパスと環境IDを変更します。
スクリプトの実行
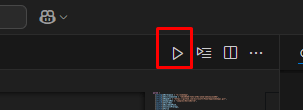
PowerShellの拡張機能をインストールします。インストール後、PowerShellを実行します。
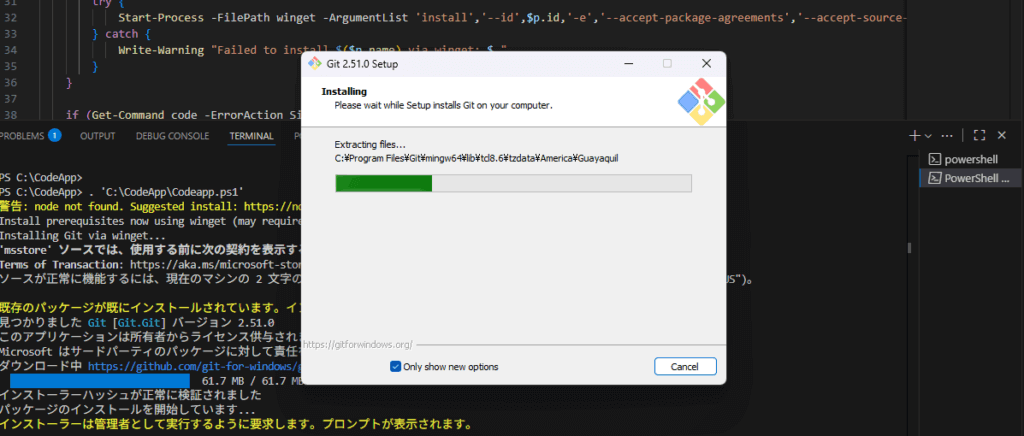
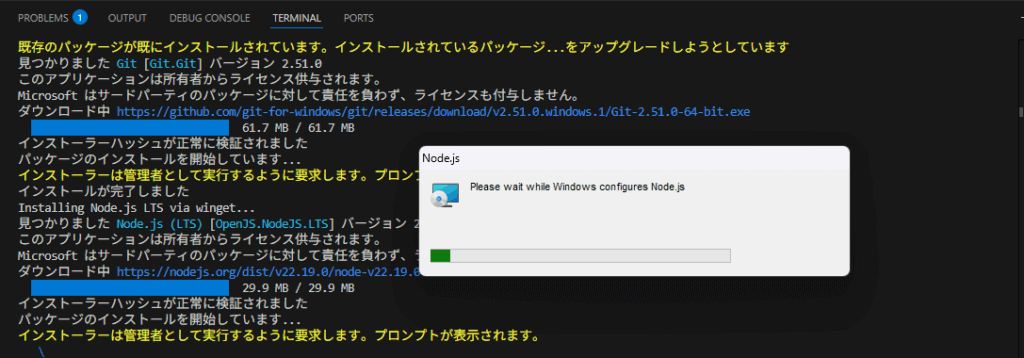
画面上必要なインストーラーがポップアップされますので、都度インストールするようにします。
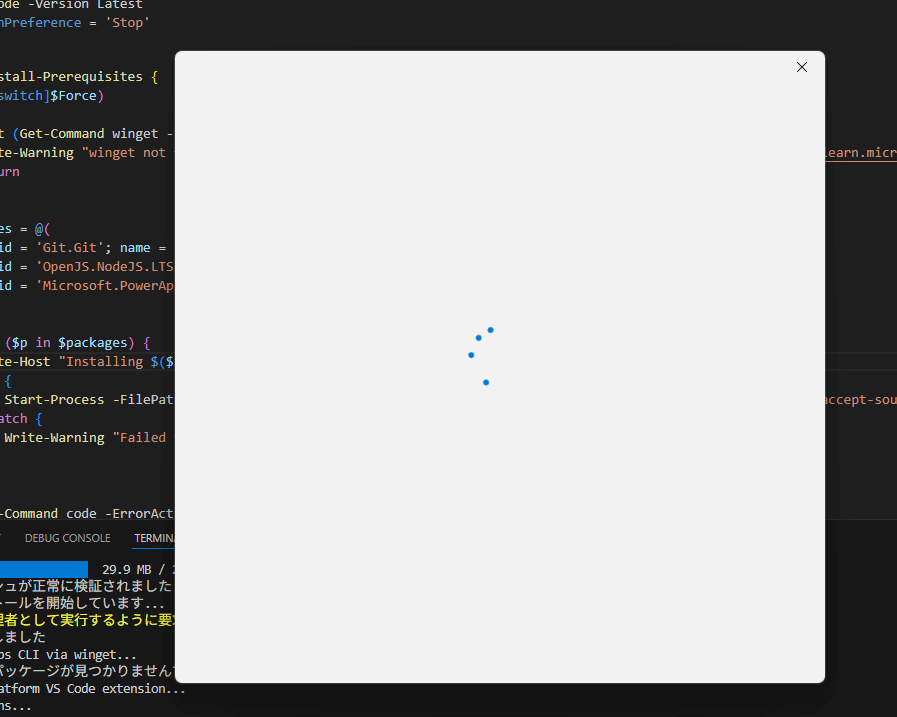
Nodeまでインストールが実行されたら、次にPower Platform Toolsがサインインを求めてきます。VSCode上で許可をします。
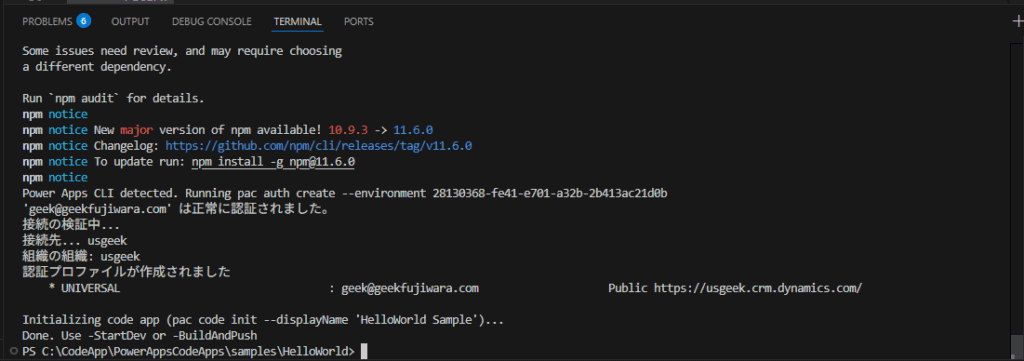
認証を行います。
Power Apps CLIのインストールに伴い、Terminalを再起動します。
ローカルでの実行
前提条件のインストールが完了したため、ローカルでの実行を試します。 -StartDev をPowerShellのパスにつなげて実行します。

こちらは、以下のコマンドで実行することもできます。
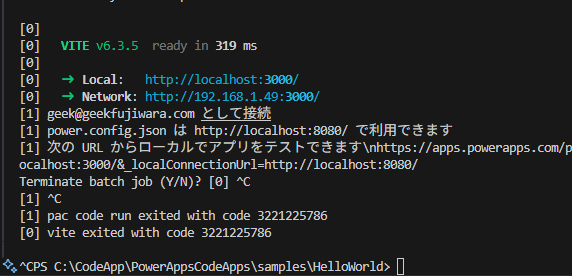
npm run dev | pac code run実行するとローカルで実行できるURLが出力されます。

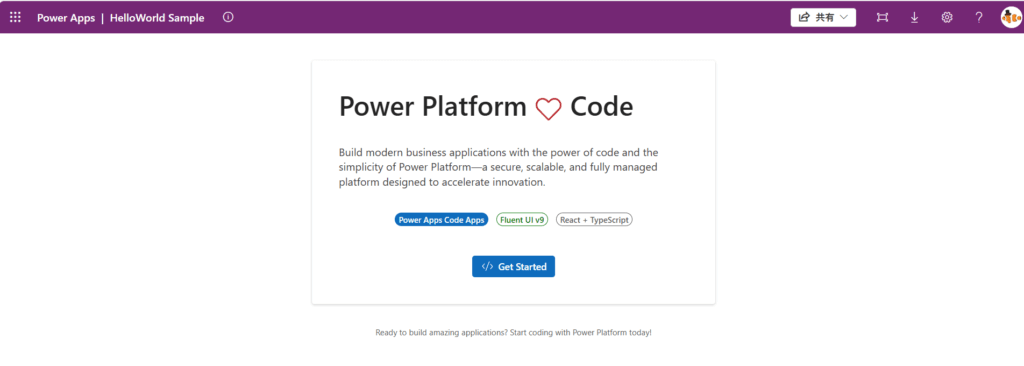
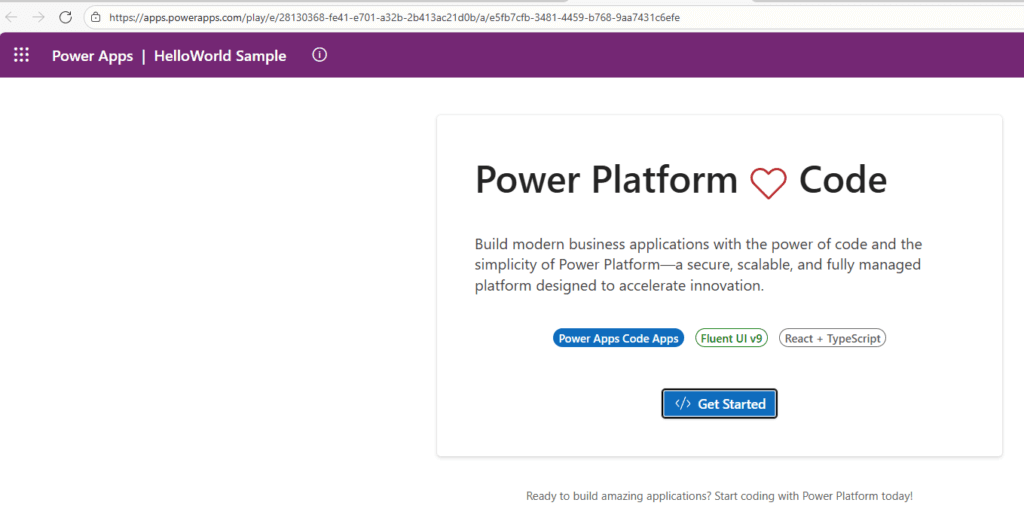
実行するとブラウザー上でアプリが実行されます。
アプリ実行を終了するには Ctrl+C にて終了できます。
2回押す必要があります。
Power Platform 環境にデプロイする
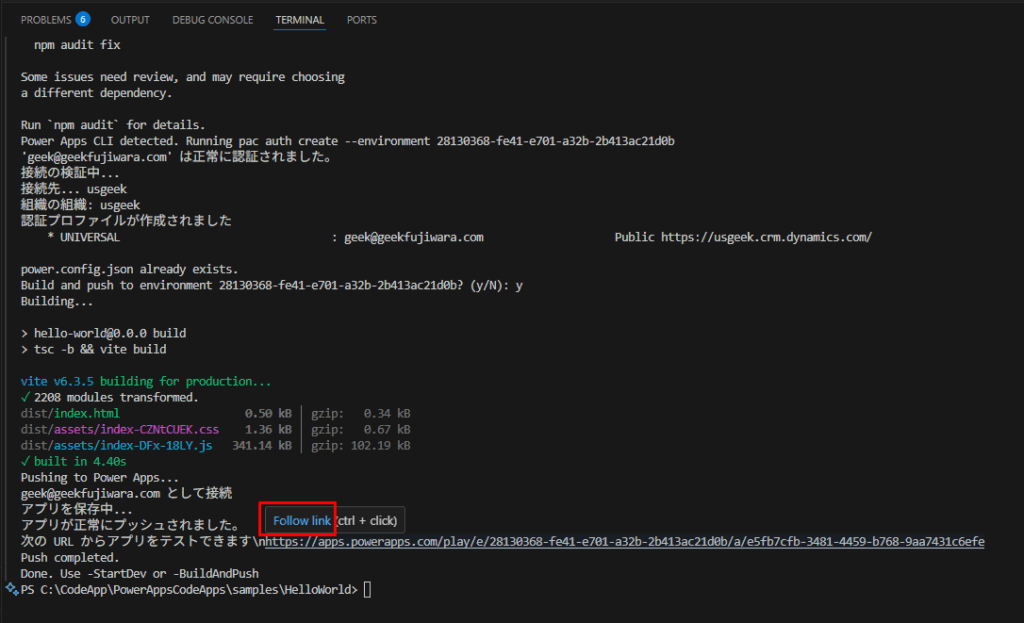
実際にCode Appsをデプロイしましょう。PowerShellのパスを指定し、さらに-BuildAndPush も追加します。
'C:\CodeApp\Codeapp.ps1' -BuildAndPushこの引数を追加すると、環境にプッシュまでしてくれます。
PowerShellを用いないで実行する場合は、以下のコマンドを利用することもできます。
npm run build | pac code push結果、以下のようにURLが出力されます。
出力結果
種類がコードのアプリが作成されます。
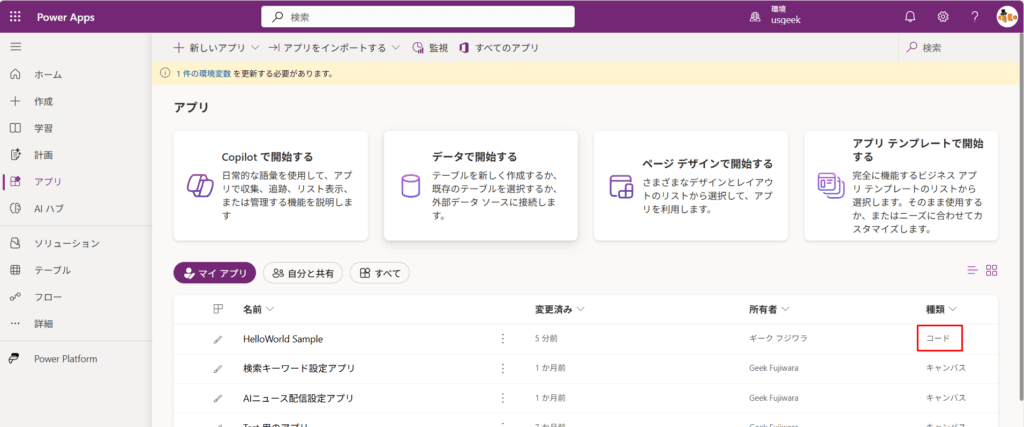
実際に実行してみるとこのようなアプリが作成されています。
環境の準備が完了
ここまでで、最初のCode appsをデプロイする事ができました。これにより環境の準備も整いました。
まとめとVibe Codingの可能性
Power Apps Code Appsは、従来のローコードを用いた開発ではなく、柔軟性の高いプロ開発の言語での開発資産をPower Platform環境に持ち込む機能です。
プロ開発の言語での開発は難易度が高く感じますが、GitHub Copilotと連携することで、自然言語からコードを生成する「Vibe Coding」スタイルで取り組む事もできます。
これにより、直感的な開発が可能になります。
しかしながら、基本的な開発の知識やデバッグの知識は必要になるため、プロ開発者の方が利用するとよいでしょう。
- Copilotによるコード提案
- Power Appsとの統合によるローコードとプロコードの融合
- 開発スピードの向上
「こんな機能が欲しい」と思ったら、Copilotに話しかけるだけでコードが提案される。そんな未来が現実になっています。
Power Apps Code Appsは、日本語環境でも問題なく利用可能であり、GitHub Copilotとの連携により、開発の生産性と柔軟性を大幅に向上させることができます。新しい開発スタイルをぜひ体験してみてください。